


Ever had a stony landing morph your beloved deck’s surface into a sketchy, split battlefield? Oh man, that’s just the sickest blow, ain’t it? Well, hold up because I’m gonna show you how to wage war against these darn delaminations and get your skateboard back into a dope ride. Heck, you might even make it look brand new with this solid advice! Earlier, I busted some tech about how skateboards are made, and yeah, that knowledge – it’s something you’ll need here. So, anyway, let’s get right into it.
What is a delamination?
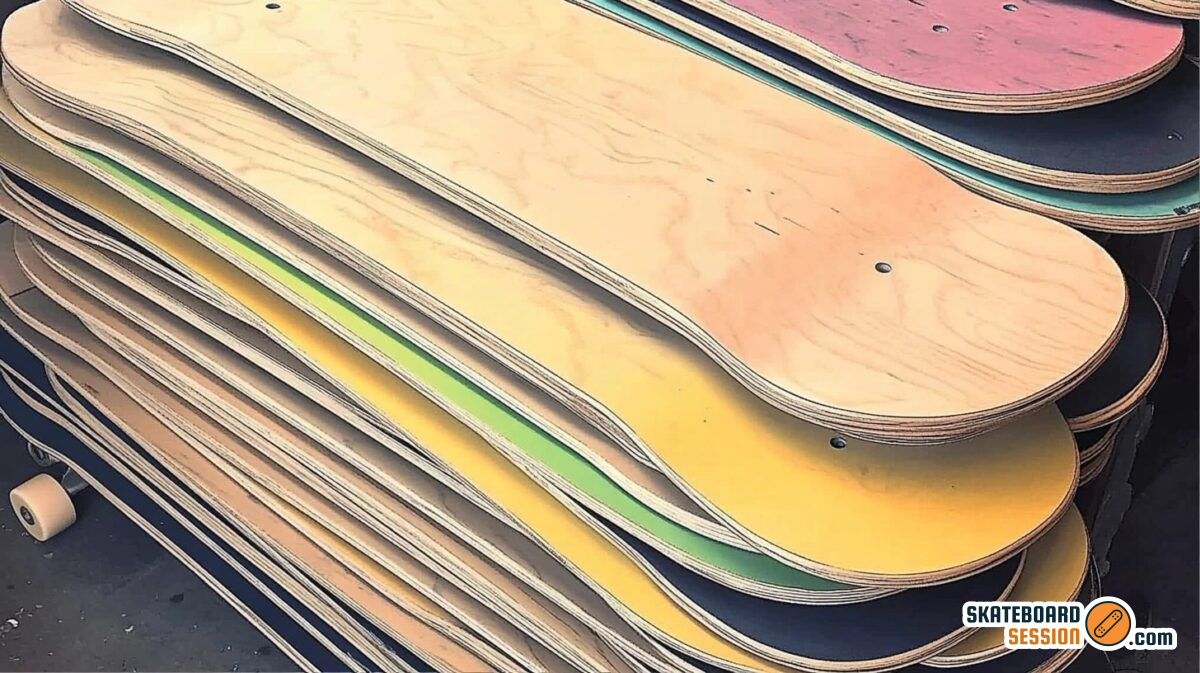
So, delamination is when layers of your dear skateboard start acting all untidy and weird, splitting like they don’t want to hang out together anymore. Yeah, it’s like that crazy, dense block party where everyone ends up in different corners of the house. Not cool, especially when your board is on the line.
Delaminations pretty much just loom on your board after a hard knock with a curb or some other concrete monster, cracking open the layers of the board. It’s like your board deciding to show you its guts. Now, that’s a sight no skateboarder wants.
Bones REDS Skateboard Bearings
Bones REDS Skateboard Bearings
- High-speed
- Pre-lubricated
- Inexpensive
I may earn a commission if you make a purchase at no additional cost to you.
How to fix delaminations?
Alright, let’s get those boards patched up. We’re gonna need some regular items and a good dose of patience. Are you ready?
Step. 1: Clean the area
First things first, make sure the affected area is as clean as a whistle. Wipe it off, or better yet, use a Q-tip or paper towel dabbed with a bit of rubbing alcohol to wipe it down decent. Make sure you’ve banished every bit of dust or lint, else you’re never gonna get that perfect seal, and we’ll be doing this dance all over again soon. Not really what we want, right?
Step. 2: Apply the wood glue
Next up, it’s showtime for your wood glue. Gently apply the glue to the crack, and be careful not to force it open too much. Remember, we’re trying to fix the board, not bust it open some more! If you have some toothpicks lying around, they could come in handy to hold open the delaminated area – just be extra careful. u003cbru003eu003cbru003eHere’s a pro tip: position your board right so that the glue can be poured right into the crack. If you got the flat nozzle kind, you’re golden – just inject the glue right in.
Step. 3: Squeeze and wipe off the excess
Alright, now squeeze it together. Watch as the wood glue comes oozing out of the crack. But don’t fret! All’s cool. Wipe it off, let it dry, and the excess can be laminated over the crack’s external part for an extra seal.
Step. 4: Clamp it up
It’s time to bring in your soft-ended clamps. Clamp that board u003cemu003ereal tightu003c/emu003e, but easy does it – no need to damage the wood. These rubber-ended clamps are perfect for not damaging your boards, but if those aren’t around, some scrap cloth would do too, although you might end up sticking to the glue.
Step. 5: The clamped night
Let your board sleep it off, all clamped up. By dawn, your deck’ll look like it just walked off the store.
Step. 6: Final touch-up
Now, if pieces of your board went AWOL during the delamination, you can bring out the wood filler. It’ll need a few hours to set, post which you can sand it down and apply some paint or a coat of sealer. But remember, this is good for small fixes – don’t try to play Frankenstein and rebuild most of your board with wood filler.
Dos and don’ts of fixing delaminations
Alright, people. Now that we’ve ridden through the basics let’s talk about the dos and don’ts of fixing delaminations. As with anything in skateboarding, and well, life, there are always those golden rules to keep in mind, some acceptable shortcuts, and then there are just some things you definitely should NOT do. So here, we’ve got the table all set:
| Dos | Don’ts |
|---|---|
| Do clean the area thoroughly before applying the glue. | Don’t force open the crack too much. |
| Do make sure the glue penetrates well into the crack. | Don’t rush the drying process – let it sit overnight. |
| Do wipe off the excess glue. | Don’t attempt to fix large parts of your board with wood filler. |
| Do use soft-ended clamps for a firm grip. | Don’t skip on sanding and painting for the perfect finish. |
Free Download: My 20 Essential Skateboard Tricks PDF
Sign up to receive my 20 Flatground Tricks Checklist—a systematic approach to tracking and landing flatground tricks.

What are some tips for fixing skateboard delamination?
Now, let’s dive into some more tips to make this jigsaw puzzle easier to solve! Here are a couple of additional thoughts to keep in mind when you’re inarguably confronted with the infamous delamination:
- Ensure that you’re opting for a high-quality wood glue. Your skateboard’s life pretty much hinges on it. Trust me, it’ll make your life a whole lot easier.
- Be gentle when dealing with the delaminated area. We don’t want to end up doing more damage than repair.
- The drying or curing process is crucial. So, ensure that your work area is dry, as excess moisture can interfere with the wood glue adhesion.
- Opt for clamps with rubber ends to avoid damaging the wood. They’re a safe bet for this job.
My board-saving experience
I’m not a pro, but I am a guy who ate up countless hours failing, learning, and then nailing that kickflip – or fixing my crushed deck. Skateboarding, for me, is more than just tricks and flips. It’s a lifestyle and the skateboard? It’s the lifeblood of this culture.

Once, after a solid week of hitting new lines at the local vert, I came home to find my deck had delaminated. It looked pretty much toasted. But you know what? I fought back. With a little patience, some gorilla wood glue, and determination, I nursed my deck back into shape. It was a rollercoaster journey, but one that was worth every second. So, if I can do it, you definitely can!
Remember, in skateboarding and in life, it’s not about how hard you fall, but how promptly you bounce back. So let’s bounce back, with our boards in hand and shred those streets all over again!
Did you know an estimated 3.1 million skateboards are sold in the U.S. annually? Now, imagine the number of these boards facing delamination and the sheer amount of money that goes into replacing them. Let’s look at critical data illustrating the financial benefits of learning to fix delaminations versus buying a new skateboard.
| Cost Scenario | Average Cost (USD) |
|---|---|
| Cost of New Skateboard | 50-200 |
| Cost of Wood Glue | 5-15 |
| Cost of Clamps | 10-30 |
| Cost of Wood Filler | 10 |
| Cost of Sandpaper | 5 |
| Total Cost of Delamination Repair | 30-60 |
Advantages and disadvantages of fixing delaminations on your skateboard
While every coin has two sides, skateboards have two trucks. So, let’s see if fixing delaminations is a safe bet or just a sketchy grind.
Advantages of fixing delaminations
Pretty dope about bringing your deck back to life without shelling out for a new one right? But that’s just the tip of the iceberg!
- Cost-effective: It’s way cheaper to buy the repairing materials than a brand new skateboard. It’s more buck to your tricks!
- Skateboard Preservation: Got a board with a killer design or some insane, nostalgic value? Don’t let delaminations force you into dumping it.
- Upgrade Skills: Well, it’s not a new trick, but it broadens your knowledge about your board. Plus, who knows when these skills might help a fellow skateboarder!
Disadvantages of fixing delaminations
Hang on though, there could be a couple of downsides to this board resuscitation gig you need to be ready for!
- Time-consuming: This process, although simple, requires patience, especially when letting the repaired area dry. Skateboarding lies in wait!
- Risk of Further Damage: If not careful during the process, especially when applying the glue and using the clamp, you run the risk of damaging the board further.
- Limited utility: For boards with severe or multiple delaminations, this method might not cut it, and a new board may be unavoidable.
Frequently Asked Questions (FAQ)
Still curious about some nitty-gritty details on delamination repair? No worries! You’re just like me, always curious and itching to learn more. So, I’ve compiled some not-so-frequently asked questions for all you knowledge-hungry shredders!
Can I use wood glue for all types of skateboards?
Absolutely! Although most skateboards are made from wooden layers, there are exceptions. Some are made from plastic with metal reinforcements, aluminum, or even solid wood, but the repair process remains pretty much the same. The critical factor is ensuring the wood glue penetrates well into the crack. Here’s a link to how skateboards are made, for a detailed dive into its construction.
What if I don’t have a clamp with rubber ends?
Not a big problem! You can be resourceful. If you don’t have clamps with rubber ends, you can insulate the clamp ends with some material, like scrap cloth. It’ll help prevent damage to your board, but remember, they might stick to the glue. So, it’s always a safe bet to opt for rubber-ended clamps when you can.
Can I do tricks or skate at high speed after the repair?
Absolutely, but always ensure the sealant, filler, or glue has completely dried before hitting the streets or parks again. Take it easy after the repair. Once you’ve ensured the repaired section is solid, you can ride your board like before. However, keep checking the fixed area after every ride, especially when you’re doing tricks or hitting high speeds. Here’s an informative insight on doing an axle stall, a solid trick to add to your repertoire!
Is it better just to replace the board instead of repairing it?
Hey, hold up right there! It’s always worth trying to repair your board before replacing it. The cost-efficiency combined with the preservation of your beloved deck is worth the effort. However, if delaminations are widespread or severe enough to pose safety risks, a new board is always a solid choice.
Final thoughts
So, that’s pretty much a wrap on fixing skateboard delaminations. We’ve pounded the pavement, got dirty with glue, and resurrected our boards. Remember, these are just obstacles that make our skateboarding journey all the more exhilarating. So, next time your board gets cracked, don’t flip out (Unless you’re doing a kickflip). Skateboards might break, but our spirit? NEVER!
Here’s a little something to ponder on. What’s the gnarliest skateboard fix you’ve ever pulled off? Was it a full-blown delamination resurrection, or did you nurse your skateboard back from some other wild mishap? And did I cover everything you wanted to know? Let me know in the comments section below. I read and reply to every comment. If you found this article helpful, share it with a friend, and check out my full blog for more tips and tricks on shredding those streets and ramps. Thanks for reading and keep shredding!
Key takeaways
This article covered essential nuggets on fixing skateboard delaminations. Here are some key takeaways:
- Clean the affected area thoroughly before starting the repair.
- Use high-quality wood glue for effective adhesion.
- Use clamps with soft or rubber ends for the best results.
- Let the fixed area dry well before hitting the streets again.
- Regularly inspect your skateboard, especially after tricks or high-speed rides.
- Attempting a repair is worth it before considering a replacement.
- And lastly, be patient and have fun with the process – every scar is a story of its rad ride!


